Your boss just informed you that you will be using MapBusinessOnline to build a customer visualization map of the company business. It’s Monday and you have until Wednesday to get that map on his laptop for a business presentation he’s got scheduled for Thursday.
For some of you, your boss may have specified more specific aspects of his required map, for others he just expects you to know what he wants. Either way, how do you build your first business map?
Where Do I Start?
Make sure you have a registered account at the Map Business Online website. The FREE trial will allow you to build and save two maps and import up to 1,000 location records. If you think that’s good enough, give your first map a whirl. Remember FREE trial printouts will have a watermark that goes away with a paid subscription, but the interactive web map sharing will be there for a FREE trial account.
We recommend signing up for a full year subscription at $500.00 per user per year (for the USA or Canada.). You’ll use your email address to register and to login.
Next download the Map App. The Map App includes a button icon (Windows Start Menu or Mac Applications folder) to launch the map application. Login with your email and password. (For more on the Map App see the bold text at the bottom of this article.)
As Map Business Online takes a few moments to start and get the application ready for business mapping. A first-time user of Map Business Online will find the application starts up leaving you at the New Map option. Choose Create New Map using the Default view.
USA subscribers will start their first map as a basic USA wide street map. There should be a Manage Map & Data blue box open on the left of your screen. This box lets you turn layers off and on and by clicking the each layers edit gear you can adjust the transparency, color, border thickness, and labels associated with each map layer. Think ZIP code look and feel, but manage Map & Data also controls counties, states and map background.
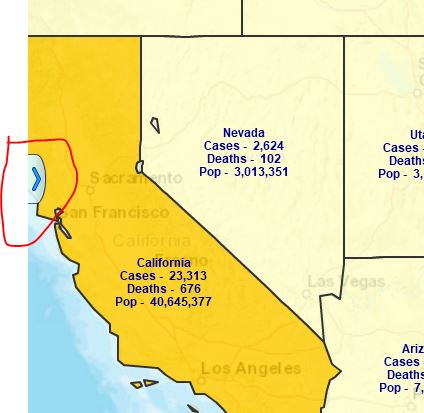
If you lose that Blue Manage Map & Data box, fear not. Click the Gray and Blue arrow button located on the Left side of your map right in the middle of the left side panel.
Import Your Customer Data
Most new Map Business Online users jump right to importing their business data before they tweak map layers, and because your boss asked you to build a customer visualization map, we’ll do that too.
Click the Dataset button in the Adding to Map section of the Master Toolbar, located five buttons in from the left side. The Dataset button icon is a red map tack with a green plus sign. Browse to where your customer data is located, in Excel, CSV or any standard spreadsheet data file format.
Your imported data should be arranged in sensible columns with headers:
| Business Name | Address | City | State | ZIP code | 2017 Sales | |
| Rick & Nance Hair Salon | 19 Norwood Ave | Rockport | MA | 01966 | $243 | |
| Bobby Orlando Salon | 88 Main Street | Rockport | MA | 01966 | $239 | |
| Walter Julian Doo’s | 74 Main Street | Rockport | MA | 01966 | $241 |
- Select your data source and click Next.
- Select the desired Sheet in your spreadsheet
- Make sure the correct columns from your data are assigned to the proper addressing drop downs. Usually this is a simple double-check, but we sometimes assign weird column headings which can confuse a mapping tool looking for words like ZIP or State, or something close
- In the final dialogue-box you’ll find options for labeling. Choose columns in your data that make sense for your on-map Callout tags. Fill up to five flexible fields with information in addition to addressing. Then click Plot.
The Data Window will automatically pop-up showing your data in a MapBusinessOnline tabular sheet. You’ll see a column on the Data Window left side with colored dots that displays the level of accuracy in your geocoding. Green is great, Yellow is good, and a Red X means it didn’t geocode at all.
You map will now display colored dots symbols at your address locations.
- If you geocoded by ZIP code only, there will be dots in the middle of ZIP codes
- If you have duplicated addresses, symbols will be stacked and when selected a list of Named options will appear for selection
To select another symbol, in the Data Window view make sure your data is selected in the data drop down, then move to the right of the drop down and click the down arrow next to the symbol noted there. You’ll find a whole library of options for symbols. You can also reach symbol options from Manage Map and Data. Hover over the layer choose the edit gear and see the symbol selector under the General Tab.
Color Code Your Data?
MapBusinessOnline will present an option to color code your data layer immediately. You are welcome to do that. You can say no for now and later choose one of the color code options on the Master Tool Bar. Usually that would be the Color Code with symbols option – three colored balls icon. Try it. The dialogue will walk you through the process with range and symbol options. You can easily click that button again to readjust the color scheme.
Map Navigation
Now that your business data is on the map your might want to understand how to quickly get around on the map. Place your mouse cursor anywhere on the map and grab the map and move it around. You can also double-click to Zoom In. But once a Map Layer, like ZIP codes, is turned on the double clicking selects objects instead of zooming.
Use the Zoom Tools located in the upper right corner of the map view. Push the scroll bar up and down to Zoom In and Out. Use the Back and Forward arrows to Undo and Redo moves on the map. Click the USA flag to Zoom to the USA view. And use that Magnifying Glass button on the bottom of the Scroll Tools to turn your Cursor into a rectangle zoom tool. Click it on and create a rectangle on your map to zoom into that area.
Use the Address Bar in the upper left-hand corner of the map view to key in an address, press the Binoculars and Zoom to that address. Key in an address this way: 19 Norwood Ave, Rockport, MA, 01966. Keying in a ZIP code will let you Zoom to that ZIP code.
Adjust the Background Map
Now go back to Manage Map and Data. The bottom check box controls the background. It probably says Streets right now. Try the different options available. Or try no background map at all. Think about what your boss might prefer.
Save Your Map
With your map more or less started, save your map view by clicking the Save button on the toolbar – it’s three buttons in from the left.
To share a map with your boss, choose the Share Interactive Map button to the right of the Save button. Choose the public share option. Copy the provided web map URL and paste it into an email to your boss. Get some feedback on the map to see if there’s more information desired, or perhaps some editing of the map view.
Read more about optimizing your map’s look and feel.
Your boss may want to do much more with your business map. Remember, with a paid subscription, you can always build multiple maps. Don’t try to solve all the world’s problems with one map. Maps can get cluttered and lose their meaning. But certainly take some notes on your new list of requirements and see what MapBusinessOnline can do to help you get the map you need.
Click the contact us button to request help or ask us some questions.
_______________________________________________
MapBusinessOnline access has officially transitioned from Web Browser (Adobe Flash Player) access to the Map App download access.
- Please download the Map App from the website – https://www.mapbusinessonline.com/App-Download.aspx.
- After installing the Map App, the MapBusinessOnline launch button will be in the Windows’ Start Menu or Mac Application folder. Find the MapBusinessOnline folder in the Start Menu scrollbar. Click the folder’s dropdown arrow and choose the MapBusinessOnline option. You can drag the icon to the taskbar for a quick launch button.
- All saved maps will be available through your Map Library Folder, the second button in from the left on the Master Toolbar. (Green File Folder icon.)
Map App access to MapBusinessOnline.com provides enhanced features and a better user experience.
The Map App includes the new Map Viewer app for free non-subscriber map sharing.
Value-Added Resellers – Offer the tool to your customers as a reseller. Make money on training and consulting. Contact us with further interest in reselling MapBusinessOnline.
Find out why over 25,000 business users log into www.MapBusinessOnline.com for their business mapping software and advanced sales territory mapping solution. The best replacement for Microsoft MapPoint happens to be the most affordable.
Please read customer reviews or review us at Capterra, or g2crowd
Contact: Geoffrey Ives geoffives@spatialteq.com or Jason Henderson jhenderson@spatialteq.com


