MapBusinessOnline announces a two-step hierarchical territory import process. Import and Assign your territories, regions, and divisions with just a few mouse clicks.
Users can easily import an Excel or CSV territory hierarchy file to create a full-tiered sales or service territory hierarchy.
MapBusinessOnline hierarchical territory support is not just a feature; it’s a game-changer. The tool provides territory mapping support for franchise, sales, and service businesses, efficiently organizing territory tiers over large geographic areas. This makes it an invaluable business tool, enhancing your sales and service management capabilities.
Territory hierarchies are most commonly applied to nationwide sales organizations. These businesses support a network of sales professionals requiring several tiers of sales managers responsible for multiple regions of the country.
Usually, hierarchical territory structures represent geographic layers of management:
- Territories – Individual salespeople are responsible for designated territory areas.
- Regions – Regional managers are responsible for a group of territory managers.
- Divisions – Vice presidents and directors manage a group of regional managers.
MapBusinessOnline territory mapping software is designed to accommodate varying management structure labels such as Zones, Areas, or Divisions. No matter how your business is structured or what labels describe your tiers, MapBusinessOnline has got you covered.
The Hierarchy Territory Process
The first step for hierarchy territory map users supporting a multi-tiered territory import process is creating a spreadsheet that reflects the desired territory, regions, and division assignments. If you already have territory assignments in MapBusinessOnline, you can export those territories to a CSV file as a starting point. Learn more about territory export here.
Below is a sample hierarchical territory spreadsheet section for your review. This particular file is for a territory map based on ZIP codes.
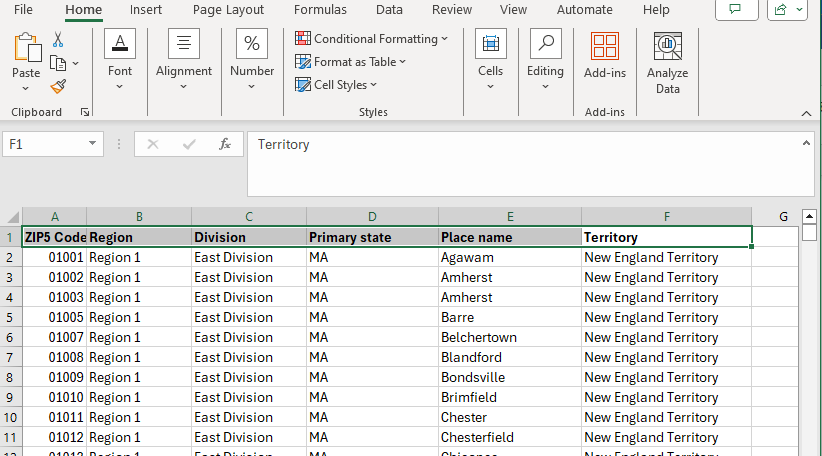
Upon import, each ZIP code is automatically assigned to a territory (column F), region (column B), and division (column C.)
- Required columns for a ZIP code-based hierarchy spreadsheet – ZIP code, Region, Division, Territory.
- Required columns for a County-based hierarchy spreadsheet – County, State, Region, Division, Territory.
Import a Territory Hierarchy
Once you’ve imported a Hierarchical Territory spreadsheet into MapBusinessOnline, you will feel comfortable creating your territory hierarchy in just one or two steps. But for clarity, these are the steps with the various options included.
- On the MapBusinessOnline Master Toolbar, select the Territories button under Adding to Map.
- In the Create Territories dialogue, select Import Multi-level Territory Hierarchy.
- Navigate to your data spreadsheet. Select the data and click Next.
- A new pop-up appears called Create Territories—Territory Levels. Here, the process presents the hierarchy of territory levels or tiers about to be imported. The map creator has the option to uncheck any of the tiers about to be imported. Click Next or click directly on Create Territories.
- A Next click above presents a new Create Territories—Alignment Options pop-up. The user can change the alignment layer assignment and ignore point ZIP codes. In most cases, the map creator will click Create Territories.
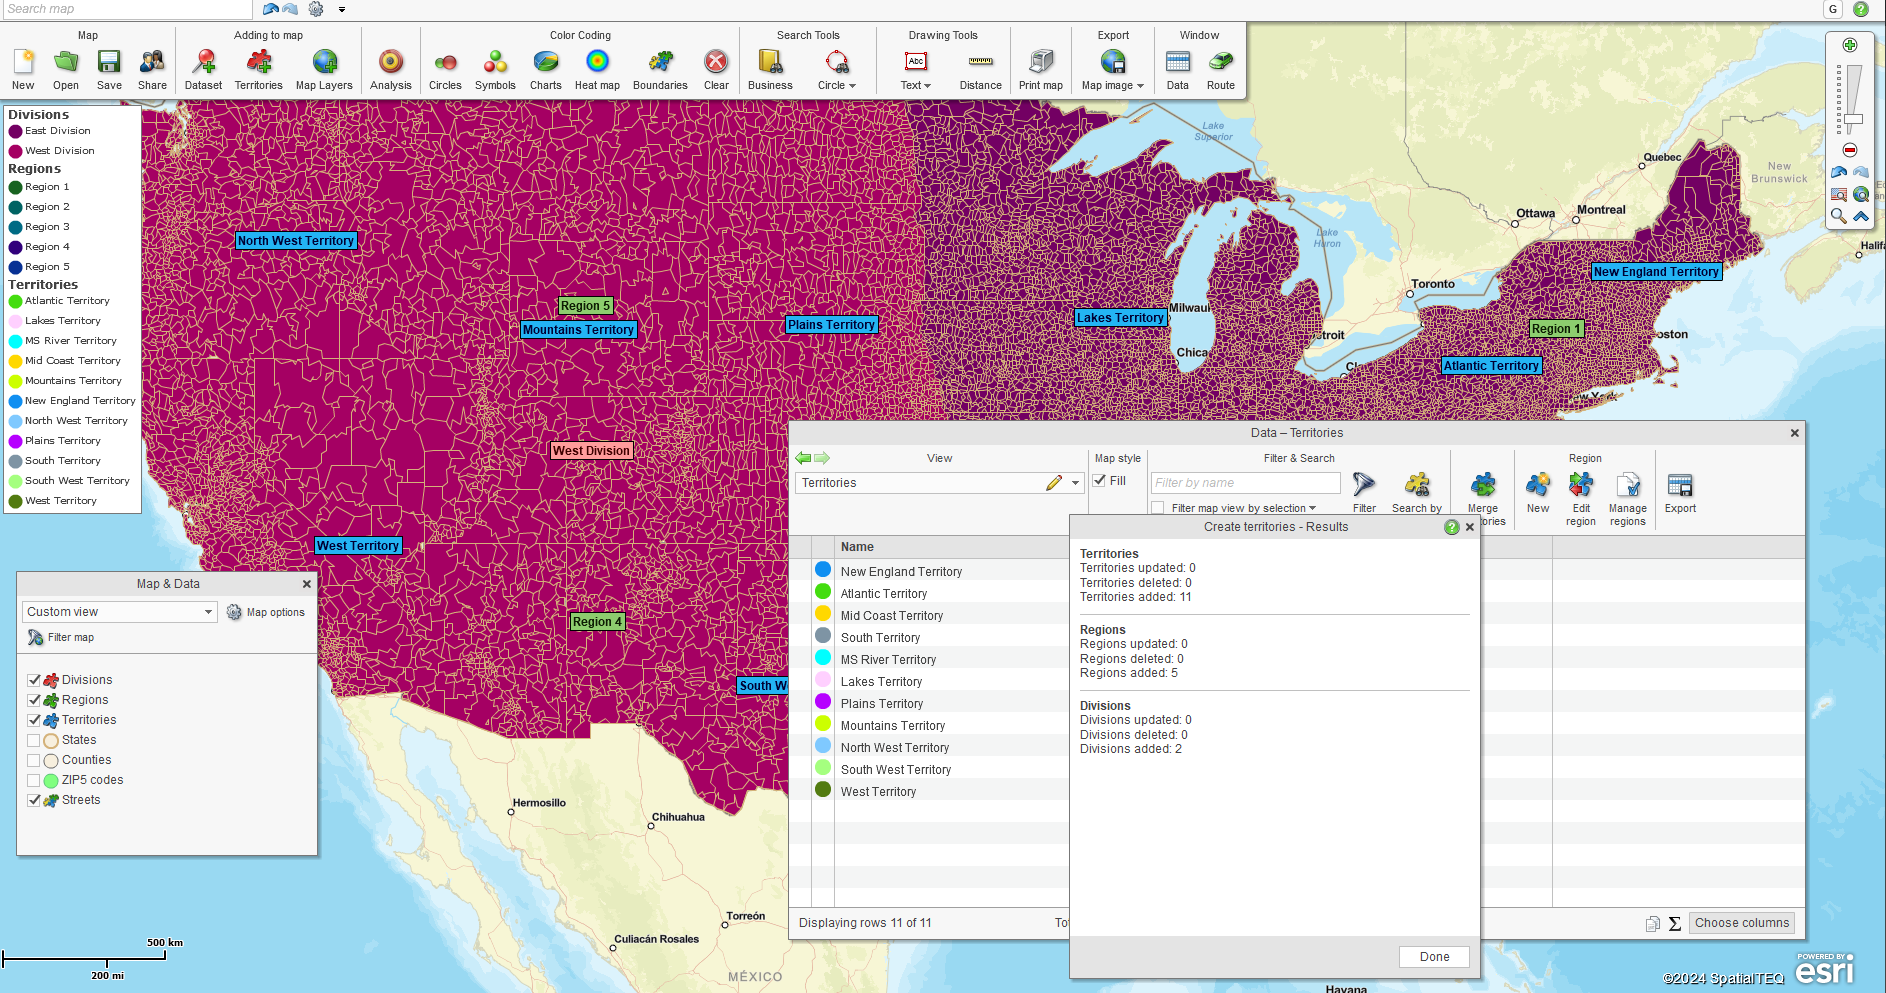
- Territories, regions, and divisions now populate the map view. The Data Window provides a territory datasheet view. A map legend listing territories, regions, and divisions also appears. A final Create Territories—Results pop-up box describes the number of territories, regions, and divisions created and any issues that might have occurred. Click Done when you’re finished reviewing the Results pop-up.
A post-import map view with the legend, Data Window, and Results pop-up is now on the MapBusinessOnline desktop:
Adjust and Refine Your Territory Map
At this point in your process, especially when creating a nationwide map based on ZIP codes, always review your map to ensure you’ve collected all the boundary ZIP codes or Counties required for your territory map. Look for unshaded areas that may need to be cleaned up. Editing territory maps is easy using MapBusinessOnline. Read more about creating a nationwide territory map.
You will also want to refine your map’s look and feel. Fine-tuning your map view makes it easier for your constituents to understand your territory map. Adding Regions and Divisions does complicate a map view.
I made several quick adjustments to each territory, region, and division layer to make the map easier to view and less cluttered:
At the Territorial Level
- In Map and Data, click the Edit Map Layer Properties button. Click on the General tab.
- Adjust the territory Boundary control to a thin, dark color.
- Check the Hide Internal Boundaries box.
- Move the Transparency bar to 60%.
- Click on the Label tab and change the Label Fill Color to White.
At the Region Level
- In Map and Data, click the Edit Map Layer Properties button. Click on the General Tab.
- Adjust the Region Boundary control to a thicker, yellow color.
- Check the Hide Internal Boundaries box.
- Move the Transparency bar to 90%.
- Click on the Label tab. Change the Label Fill Color to match the boundary color, make the text Bold, and increase the size to Large. Use your cursor to move the label to a central point in each region.
At the Division Level
- In Map and Data, click the Edit Map Layer Properties button. Click on the General Tab.
- Adjust the territory Boundary control to a thicker, darker color.
- Check the Hide Internal Boundaries box.
- Move the Transparency bar to 90%.
- Click on the Label tab. Change the Label Fill Color to match the boundary color, make the text Bold, and increase the size to Large. Use your cursor to move the label to a central point in each division.
Here’s my final map output:
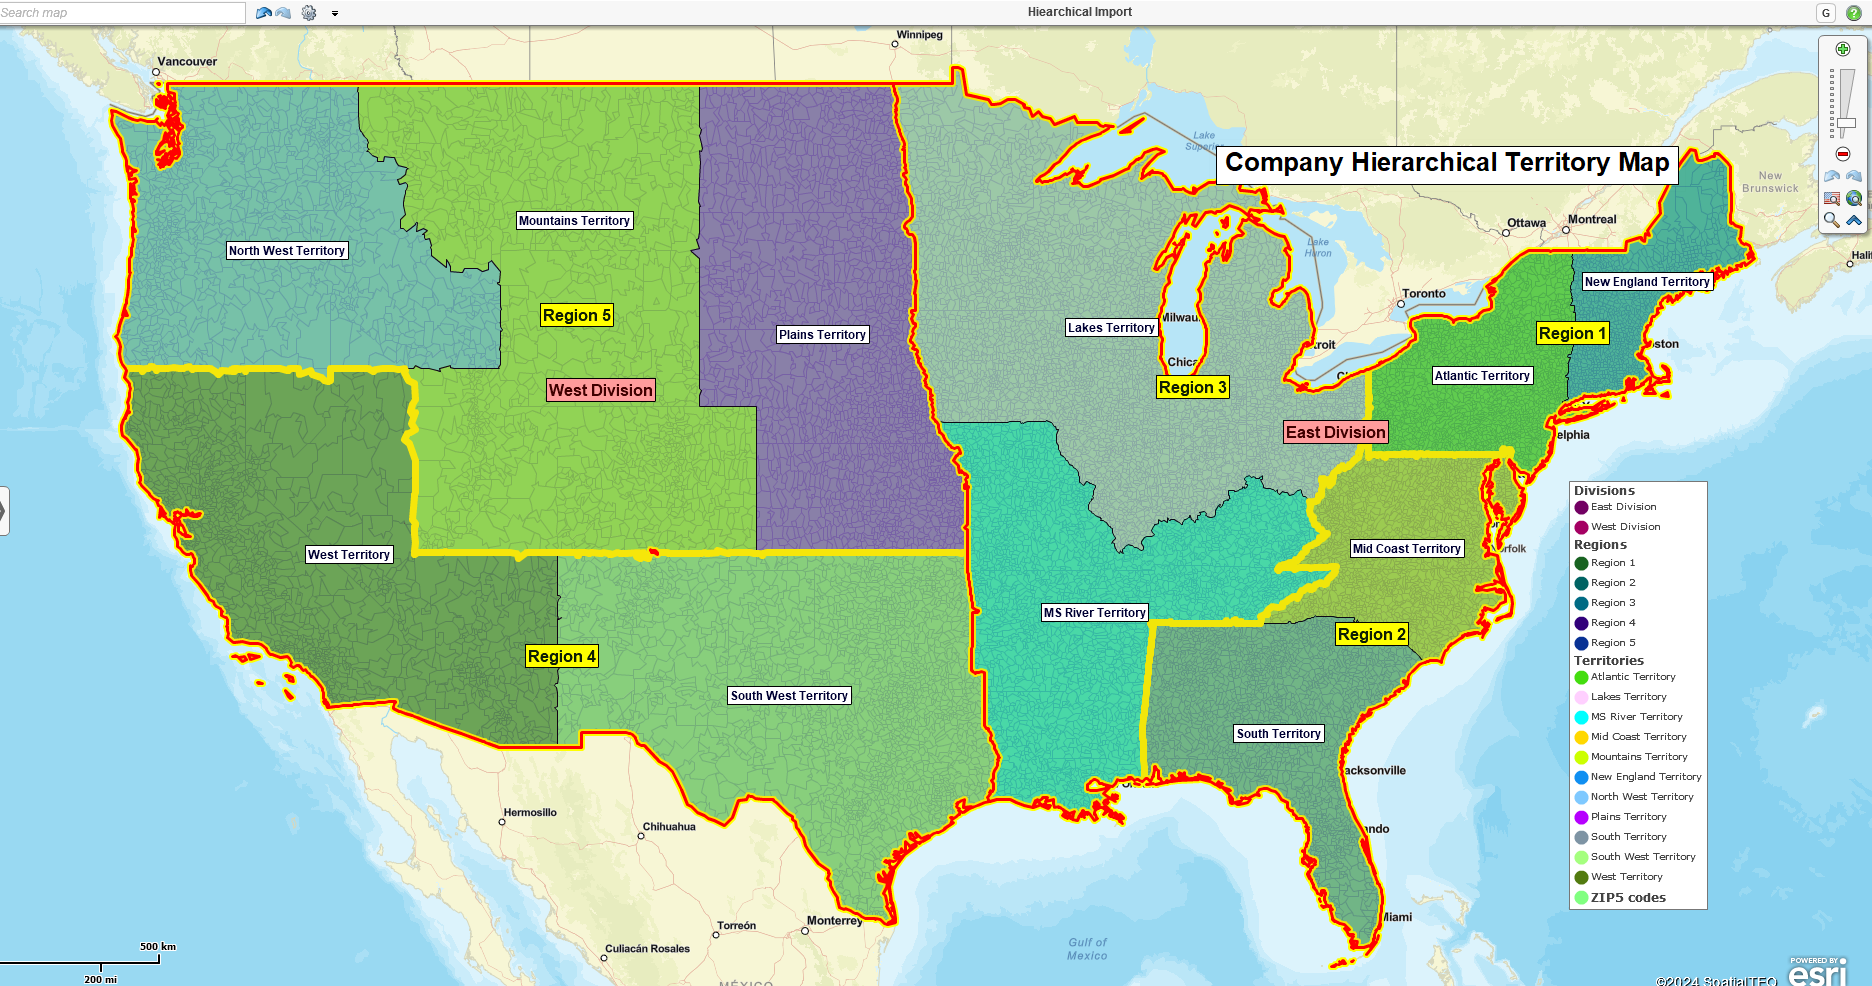
Final hierarchical territory map optimized for best look and feel.
The above adjustments are recommendations for optimizing this particular map view. Your map business map may benefit from different colors, thicknesses, and transparency choices. Read more about how to adjust your territory map’s look and feel.
Using MapusinessOnline’s import territory hierarchies should only process, including territory edits, should only take 15 minutes or so. Technical support is always available through Chat, email, or phone.